Course description
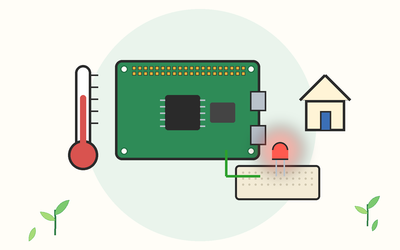
If you have a Raspberry Pi in a drawer, or you are thinking of buying one, this course takes you from an empty microSD card to a working home project, one clear step at a time, using Python and the official Raspberry Pi tools.
You start by choosing a model and installing Raspberry Pi OS, then learn the desktop, the terminal and the habits that keep your Pi safe and updated. You write Python in Thonny, the editor that comes with Raspberry Pi OS, and then move on to electronics: the GPIO pins, breadboards, resistors, LEDs, buttons, a buzzer and a motion sensor, all low voltage and powered by the Pi itself, with no soldering. Then you log readings to a CSV file, draw a chart, run programs on a schedule and serve a small web page on your home network.
There are 10 sections and 50 written lessons, each with real code and its real output, a worked example, common slips, questions people often ask and a short exercise to try, and each section ends with a short quiz. You follow Egbert, a retired fitter, as he builds a monitor for the Pi he keeps in his hall cupboard. Every section has a practice pack with starter files, worked answers, expected output, a worksheet with an answer key and a cheat sheet. The packs also hold wiring diagrams, a GPIO pin reference card, a resistor colour card, a safety card, an error message guide, sample data and the final project in five step folders.
What you'll learn
- Meet the Raspberry Pi: what a Raspberry Pi is, what is on the board, choosing a model, what you need, and using it with a screen or headless.
- Installing Raspberry Pi OS and first boot: preparing the card with Raspberry Pi Imager as the official documentation describes, the first start, the desktop and shutting down properly.
- The terminal and keeping your Pi safe: your first commands, files and folders, updates, passwords and sudo, and SSH in outline.
- Python on the Pi: writing and running programs in Thonny, values and decisions, loops and functions, files, and installing packages safely.
- GPIO pins and electronics basics: the 40-pin header, pin numbering, 3.3V and why 5V must never reach a GPIO pin, current limits, breadboards, jumper wires and resistor colour codes.
- LEDs, lights and sound: your first circuit, blinking, traffic lights, dimming and a buzzer, all with gpiozero.
- Buttons and sensors: reading a button, events, a motion sensor module and the Pi's own temperature sensor.
- Logging data and running jobs on a schedule: timestamps, a CSV log, summaries, a chart drawn with the standard library, and cron and systemd in outline.
- A web page, the camera and troubleshooting: a small web page on your home network, the camera module in outline with a note on privacy, finding faults and reading error messages.
- Final project: a home room monitor station: a station that logs the Pi's own temperature, lights an LED when it is warm and shows its readings on a local web page, built in five steps with the full code.
Who it's for
Hobbyists, parents, retirees and tinkerers who want practical home computing projects. You don't need any programming or electronics experience. If you would like more practice with Python itself, Python for Beginners: Write Real Programs from Scratch is a good companion, and if computers in general are new to you, Computers for Beginners: Use a Laptop or PC with Confidence for Email, the Internet and Everyday Tasks is a gentle place to start.
What this course is, and isn't
This is a practical, low-voltage course. It never connects anything to mains electricity, never uses the Pi to switch mains devices and needs no soldering. Every program was run with Python 3.13 and gpiozero 2.0.1.post3, using gpiozero's mock pins in place of a real Pi, so the output shown is real output from the code. Hardware facts come from the official Raspberry Pi and gpiozero documentation, read on 3 November 2026; models and software change, so the course points you to the official pages to check. Egbert and every other person in the course are fictional.